
Before I go too far into this post, I just want to point out that if you prefer to shoot on automatic mode, there is absolutely nothing wrong with that! Automatic mode enables you to focus on what is important and not lose time and miss opportunities when you’re starting out. There are still ways you can effectively make a photo more visually stimulating – check out my blog post on composition for tips and tricks.
For those looking to understand your DSL camera and what each of the photography terms mean, let’s get started!
ISO – controls camera sensor’s sensitivity
What is ISO? ISO stands for International Organisation for Standardisation, but when we refer to it in photography, we are talking about your camera’s sensitivity to light. Let me explain.
Your camera settings has numbers such as ISO100, ISO400, ISO1600 and so on. The higher the number, the more sensitive to light your camera’s sensor is (and therefore the lower the number, the less sensitive). It’s simple in theory, but to understand it better let’s dive in a little deeper.
You might be thinking that light is good when it comes to photography, so why not crank that number up? Because more light does not always mean a better picture.
Two things to take away:
- One – the higher the ISO, the more grain or noise your photo will have (not good).
- Two – keep your ISO as low as possible to improve the quality of your pictures.
My general rule for ISO is as follows:
- Outside = ISO 100
- Shaded = ISO 200
- Inside = ISO 400 – 800
Note: These rules are very general and are just to be used as a guide!
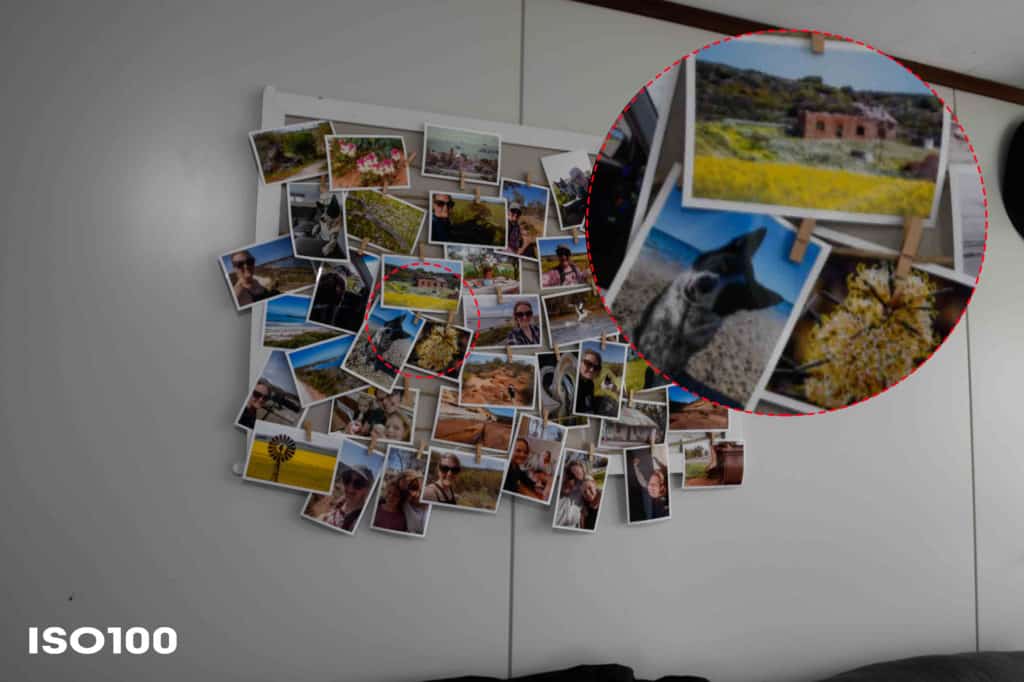
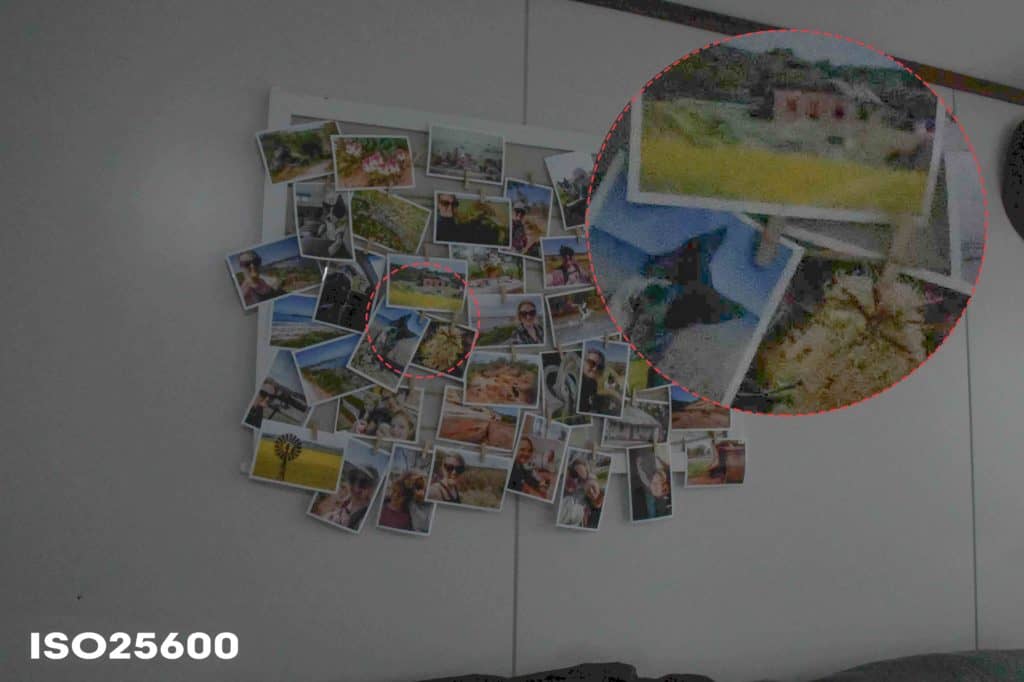
What happens if I use a high ISO? Effectively, a high ISO will mean your picture will be of lower quality. The best way to describe this is with a visual. Take a look at the two images below. The first is ISO100, and when you zoom in you can see that the photo is much clearer and has minimal noise. In the second photo I cranked up the ISO to a whopping ISO25600 (for dramatic effect) and you can see the zoomed section is less clear with lots of noise. Most home-use cameras don’t go that high with ISO (my camera is a Pro DSLR which are designed to operate better with a higher ISO), but the general rule is the cheaper the camera, the worse the noise will be when taking high ISO images.
ISO Cheat Sheet

Pro tip: Set your camera on Auto ISO while you are learning to use it because you are better off to get the shot than to miss the shot! Most cameras are capable of selecting an effective ISO.
Aperture – controls depth of field
What is aperture? Put simply, aperture is the size of the opening in your lens.
The aperture is signalled by the f/Stop number on your camera. for example f/2, f/4, f/8 and f/16.
This can be a little confusing and is where most new photographers really get lost, so if this doesn’t make sense at the end of your homework task, leave me a comment and I will help you out. The smaller the f/stop number, the bigger the “opening|hole”, which means more light. The bigger the f/stop number, the smaller the “opening|hole”, which means less light. However, this isn’t actually the important part; where the f/stop really comes into play is in creating the depth of field. In this case, the lower the f/stop number, the smaller the depth of field, and the higher the f/stop number, the bigger the depth of field.
My rule of thumb for aperture is:
- Portraits = f/2
- Group photos = f/3.5
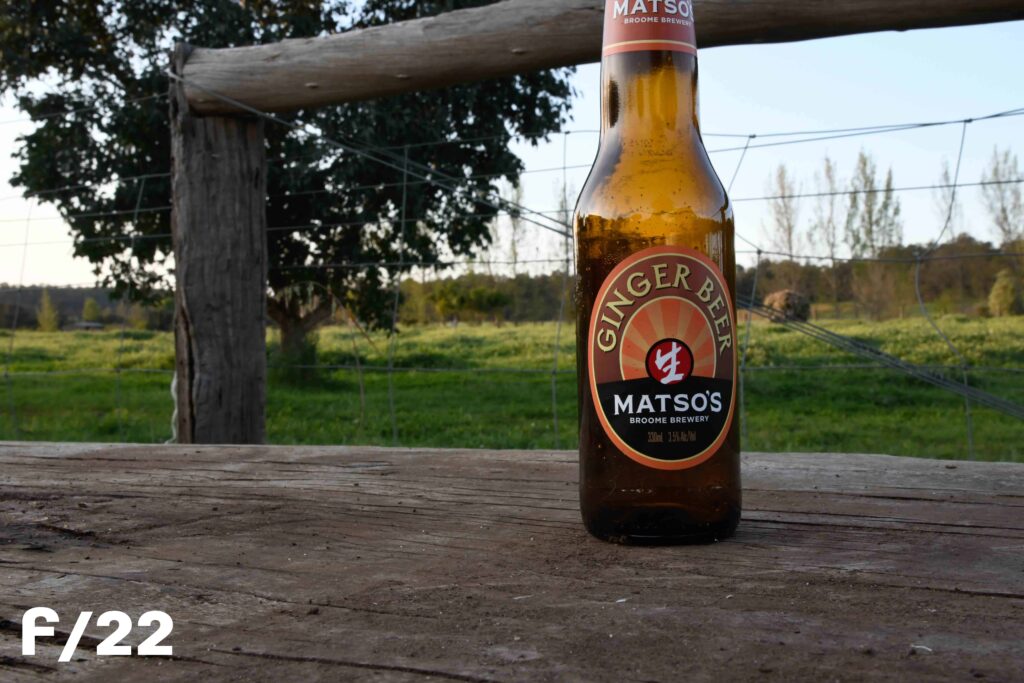
- Landscapes = f/16 – f/22 (depending on how much you want in focus)
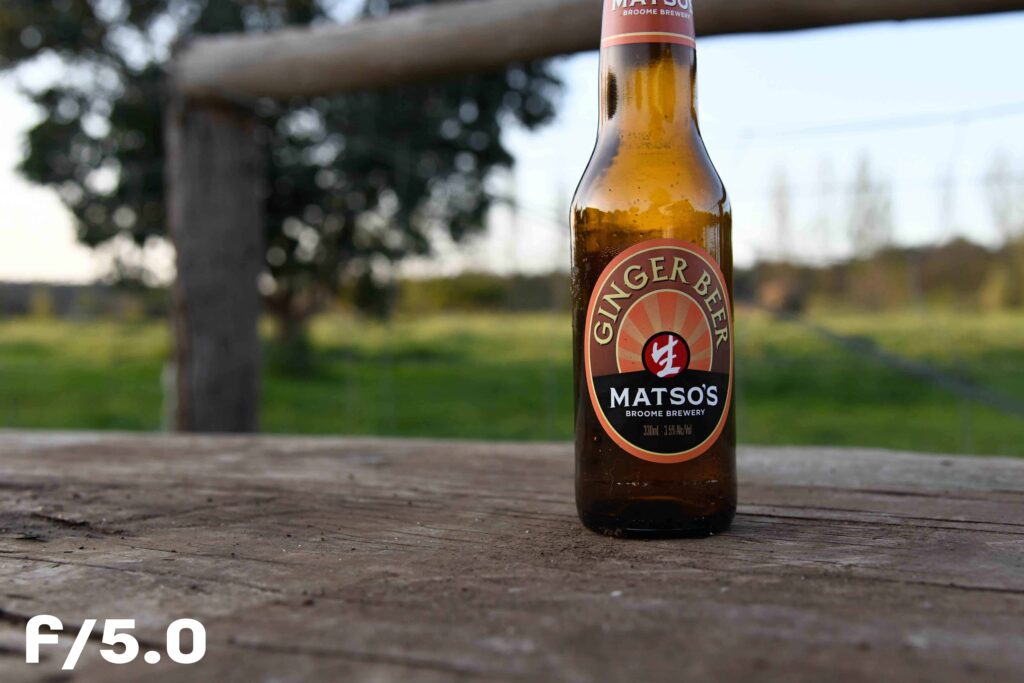
What is depth of field? Depth of field (DoF) is the distance between the closest and farthest objects that are in acceptably sharp focus in an image. If we wanted to simplify DoF even more, it’s basically how blurry the image is around the focal subject. A shallow DoF means in front and behind the focal subject is blurry, and a large DoF means that most (if not everything) is in focus around the focal subject.
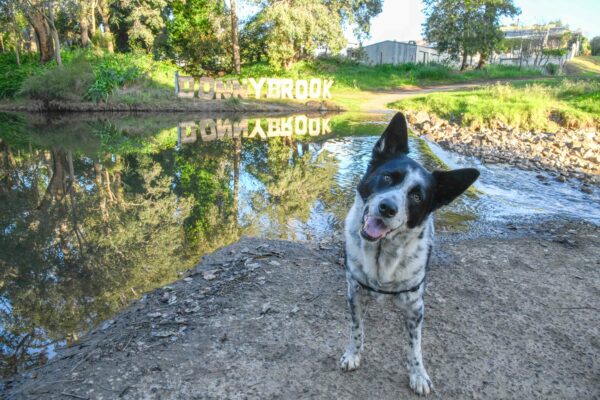
Large DoF 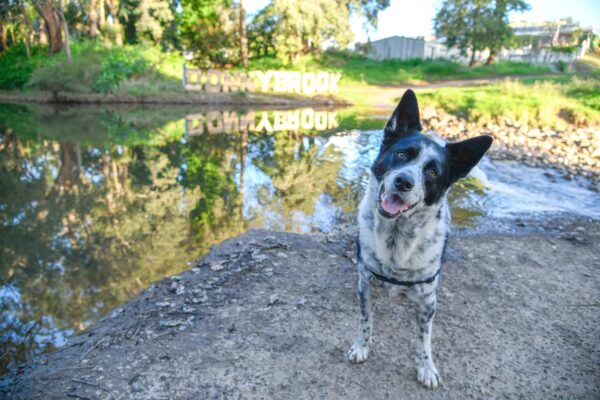
Shallow DoF
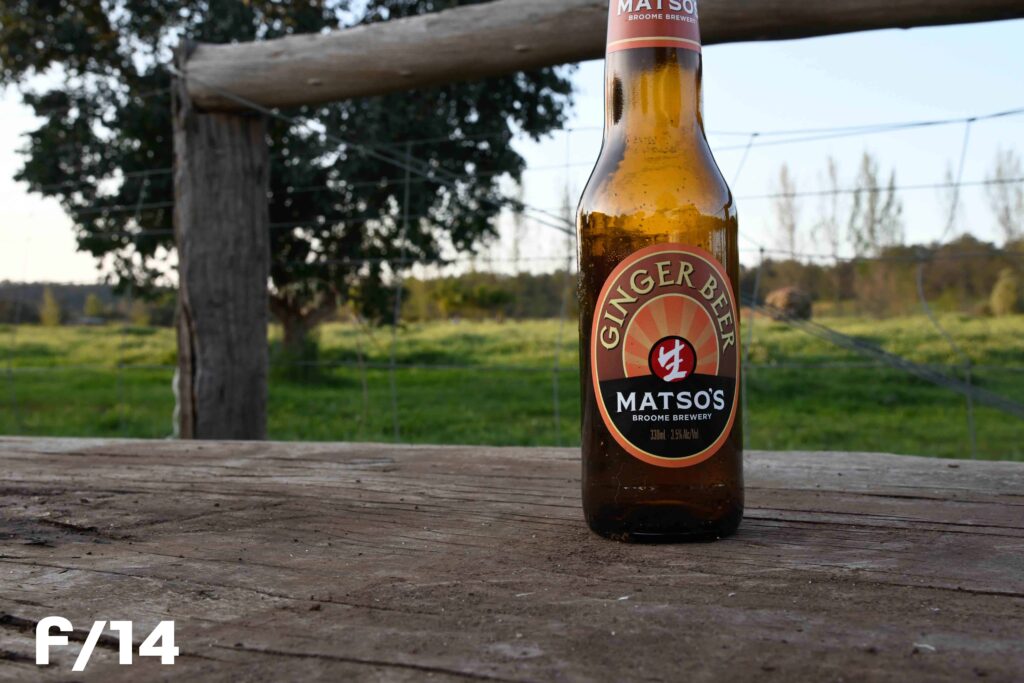
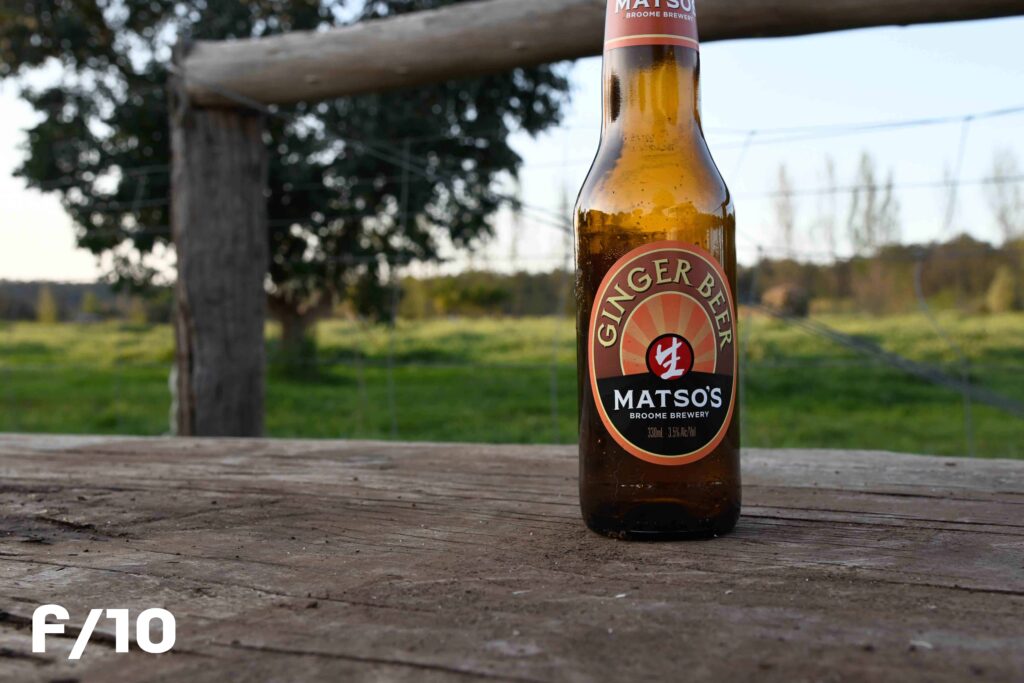
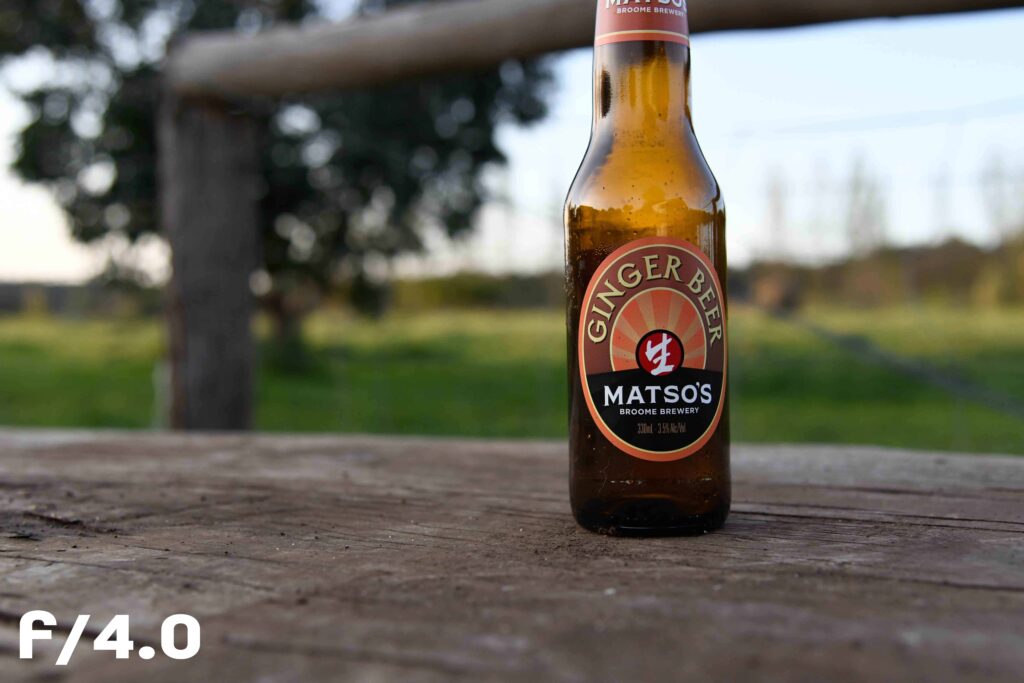
Aperture experiment|homework
To help get your head around aperture, grab a random item and start experimenting. I just used a colourful ginger beer bottle and put it on a table with my camera. Set your camera to aperture priority and select f/22, then focus on your chosen item and press the shutter button. Now, repeat these steps, each time changing the f/stop as I have below. Always focus on the item and see what happens around it. Tell us in the comments below what you noticed when you changed your f/stop.


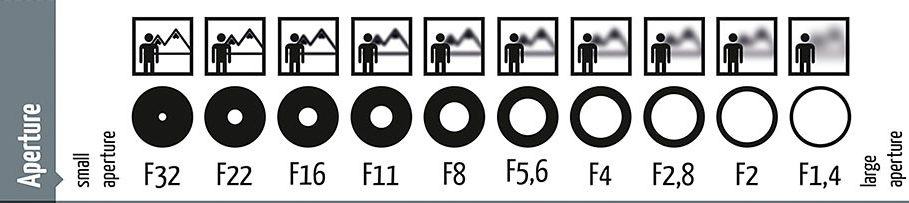
Aperture Cheat Sheet
Shutter speed – the speed of your shutter
What is shutter speed? Shutter speed is the easiest thing to learn; it is just as it says, the speed with which the shutter opens and closes when you press the shutter button. This is measured in seconds. For example, shutter speeds could be at 1/50 of a second, 1/100, 1/250, but can go all the way up to 1/8000 of a second. Some cameras allow for a much slower camera speed, from 1 second, 5 seconds or even up to 30 seconds.
Your shutter speed controls motion blur, so if you have a moving subject and you want a crisp image, you need a fast shutter speed. If you are photographing something like a waterfall and you want to create a misty look, then slow your shutter speed down.
Pro tip: If you are using a slower shutter speed, I highly recommend using a tripod to reduce the effects of camera shake.
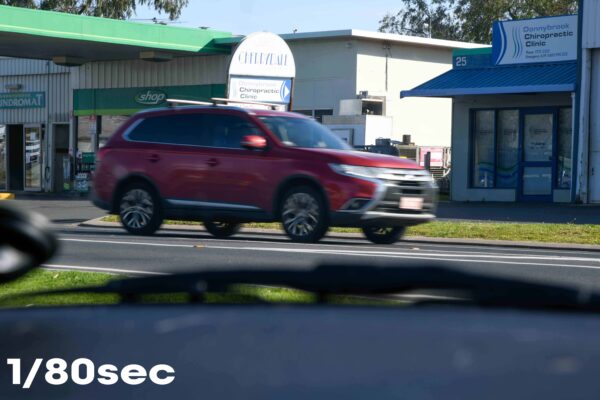
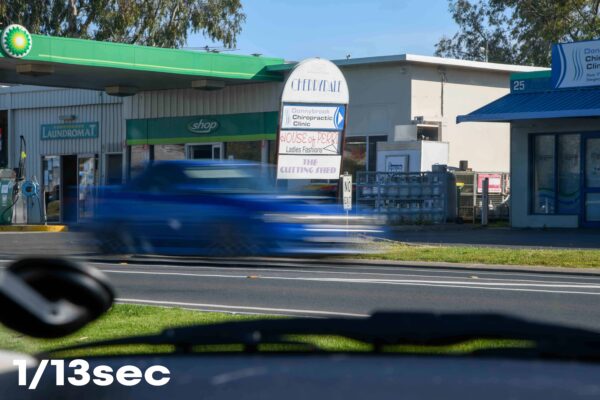
Shutter speed experiment | homework
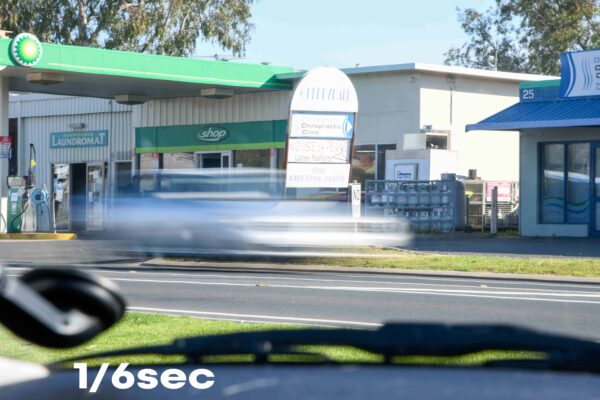
For this experiment, you just need to head out near a road. Take your camera and set it to shutter priority, then select a fast shutter speed (I suggest 1/500). This will effectively freeze motion as you take a photo of a car moving towards you. Next, try reducing the shutter speed down to 1/125 and take another photo, then repeat this for 1/30, 1/8 and 1/2. Each time you reduce the shutter speed you will notice more motion blur. Once you get the hang of it, you can use motion blur to create some great artistic photos.


Shutter speed cheat sheet

A little extra homework | experiment
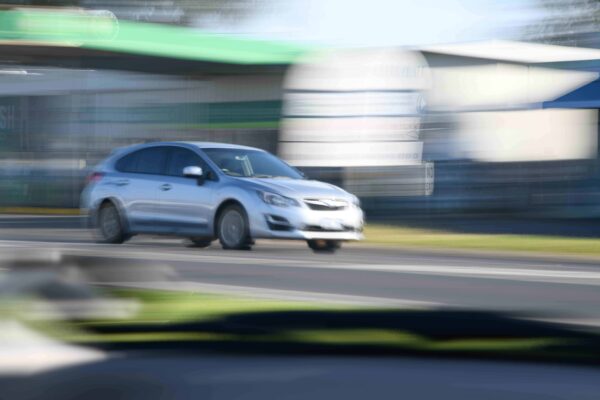
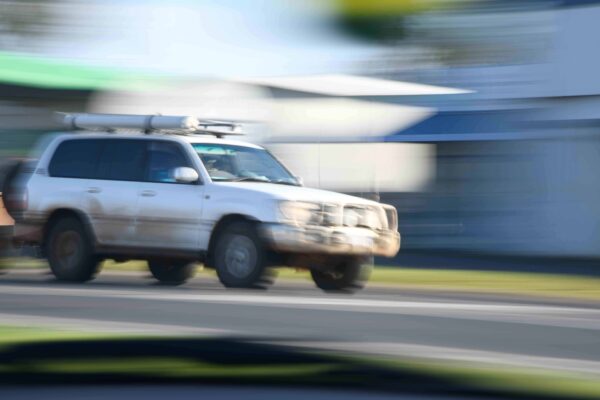
For something a little extra now you have the shutter speed down pat, I want to introduce you to panning. Panning can create a really great effect for an object such as a car to showcase it in an artistic manner. This technique shows movement in your picture but allows the focal object to be clearer. To practice panning, set your camera to a slower shutter speed and, as the car drives past, press the shutter button and follow it with your camera. The aim is to get the car in focus but the background blurred.
I would love to see the results of your experiments – please send me a message on my photography page “CLP Images by Ellie Clare” and we can work together to learn and create some incredible images!